Ever thought if a Revit model could match Carrier HAP software in HVAC load calculation? This is what we explore using Carrier HAP & Revit per ASHRAE/ISHRAE.
We offer a step-by-step guide for engineers, designers, educators, and students in India. It combines Revit software with Carrier HAP software. Our goal is to make complex HVAC load calculations easy and exciting.
This guide shows you how to prepare Revit spaces and apply construction overrides. You’ll learn to export gbXML or use Revit’s internal loads engine. Then, you’ll import geometry and schedules into Carrier HAP for detailed simulations.
You’ll discover how to calculate cooling and heating loads accurately. We also cover ventilation per ASHRAE 62.1 and psychrometric treatment for Indian climates.
Carrier HAP offers advanced features like the ASHRAE Heat Balance method. It also supports detailed plant and system modeling for various HVAC systems. Revit, on the other hand, excels in automated space generation and robust model exchange.
Expect to learn clear thermodynamics formulas and practical tips for Indian projects. We’ll also provide Revit and HAP report extracts, common-pitfall troubleshooting, and QA/QC checks. These will ensure your project meets ASHRAE and ISHRAE standards for reliable results.
Overview of HVAC Load Calculation Using Carrier HAP & Revit per ASHRAE/ISHRAE
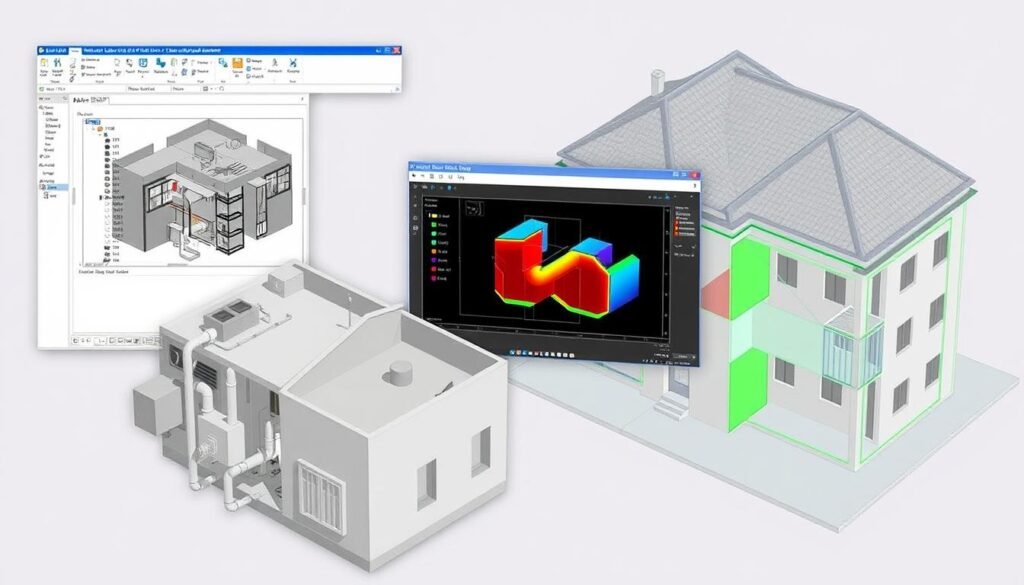
We have a simple plan that mixes real-world steps with strict standards. It shows why engineers should follow ASHRAE and ISHRAE rules for system sizing. It also explains when to pick Carrier HAP or Revit and how they work together to reduce mistakes and save time.
Why follow ASHRAE and ISHRAE standards
ASHRAE standards give us reliable methods. They include Heat Balance for accurate loads, Standard 62.1 for air flow, 90.1 for energy use, and Standard 140 for checks. These rules offer consistent methods and processes that everyone expects.
ISHRAE guidelines add to this by matching Indian climates and practices. Using both ensures comfort, safety, and meets regulations in India.
When to use Carrier HAP versus Revit for load calculations
Revit software is great at the start: it sets up geometry, defines spaces, and does initial load checks. The Loads Toolkit makes room-to-space changes fast and checks CFM quickly for early layouts.
Carrier HAP software is better for detailed design: it does hourly simulations, sizes systems, and runs full energy tests. It’s perfect for areas needing precise humidity control or complex system controls.
How Carrier HAP and Revit complement each other in design and energy modeling
Revit is our go-to for geometry and schedules. It makes room setup, surface accuracy, and internal gains easier, reducing manual work later.
We use gbXML from Revit in Carrier HAP for detailed simulations. This method often cuts down input work and reduces errors that lead to wrong load sizes.
| Task | Revit software | Carrier HAP software | Best practice |
|---|---|---|---|
| Geometry and spaces | Fast room bounding, levels, and doors | Accepts gbXML; manual edits possible | Prepare clean Revit model, export gbXML |
| Internal loads and schedules | Assign occupancy, lighting, equipment | Use schedules for hourly simulation | Map Revit schedules to HAP hourly profiles |
| Initial sizing and CFM checks | Quick loads reports for early decisions | Not intended for rapid concept checks | Use Revit for feasibility, HAP for final |
| Hourly heat balance and plant sizing | Limited hourly fidelity | Full 8,760-hour heat-balance engine | Run HAP for final energy and plant workup |
| Compliance and validation | Useful for documentation and BIM workflows | Implements ASHRAE standards and validation | Use HAP outputs for code compliance reports |
We suggest a two-step process: use Revit for early geometry and load checks, then export gbXML. Finish with Carrier HAP for detailed design and energy modeling. This method follows ashrae standards and ishrae guidelines, keeping the design process efficient and traceable.
Understanding the Heat Balance Method and Fundamental Thermodynamics
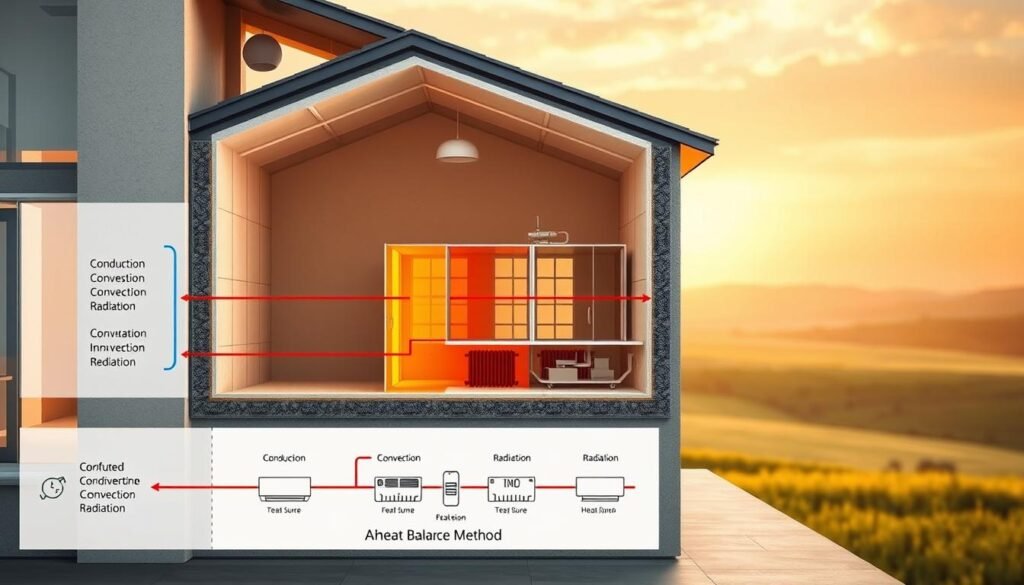
We explore the ashrae heat balance method and basic thermodynamics. This helps engineers and students use HVAC load calculation methods with confidence. We connect theory to practice, showing how heat moves, moisture changes energy needs, and why hourly simulations are key in Indian climates.
Principles of the ASHRAE heat balance method
The ashrae heat balance method sets up an energy balance for each surface and zone. It considers conduction, convection, radiation, interzone transfer, and internal gains hourly. This method models thermal mass and time-of-day effects, leading to better predictions than steady-state shortcuts.
Carrier HAP uses this method to create hourly loads and simulate system interactions across design days.
Essential thermodynamics formulas overview
Every HVAC load calculation method uses a few key equations. These include sensible heat from air, latent heat tied to moisture, conduction through assemblies, and solar gains on glazing. Section 4 gives the detailed formulas and units. We highlight why each term is important for sizing and control strategies.
Key variables made simple
U-value, R-value, and SHGC are key for heat transfer estimates. The U-value is the overall assembly conductance: U = 1 / Rtotal. R-value is the thermal resistance of layers and materials. SHGC shows the fraction of solar radiation admitted as heat through glazing; pair it with irradiance for window gain estimates.
Sensible and latent heat describe two different load components. Sensible heat changes air temperature. Latent heat involves moisture phase change and affects humidity control. The balance between sensible and latent heat determines coil capacity needs and whether a DOAS or a dedicated dehumidifier is required for comfort and code compliance.
Psychrometrics ties the pieces together: enthalpy, humidity ratio, and dew point dictate how sensible and latent heat combine during cooling and dehumidification. Revit can estimate sensible loads well, but it has limits in modeling latent dynamics and radiant delay. Carrier HAP gives a more complete treatment of moisture and time-dependent thermal storage for design-grade results.
| Concept | Definition | Practical Unit | Why it matters |
|---|---|---|---|
| U-value | Overall heat transfer coefficient of an assembly | W/m²·K or Btu/h·ft²·°F | Used to compute heat conduction: Q = U × A × ΔT; lower U reduces heat loss/gain |
| R-value | Thermal resistance of materials and layers | m²·K/W or ft²·°F·h/Btu | Sum layer R-values to derive Rtotal; invert to get U-value |
| SHGC | Fraction of solar radiation admitted through glazing | Dimensionless (0–1) | Multiply by window area and irradiance to estimate solar heat gain |
| Sensible heat | Heat that changes temperature of dry air | Btu/h or W; use formulas with CFM/ΔT | Determines temperature control and coil sensible capacity |
| Latent heat | Heat associated with moisture evaporation or condensation | Btu/h or W; use humidity ratio change × flow | Drives dehumidification load and influences indoor air quality strategies |
Required Thermodynamics Formulas for HVAC Load Calculation
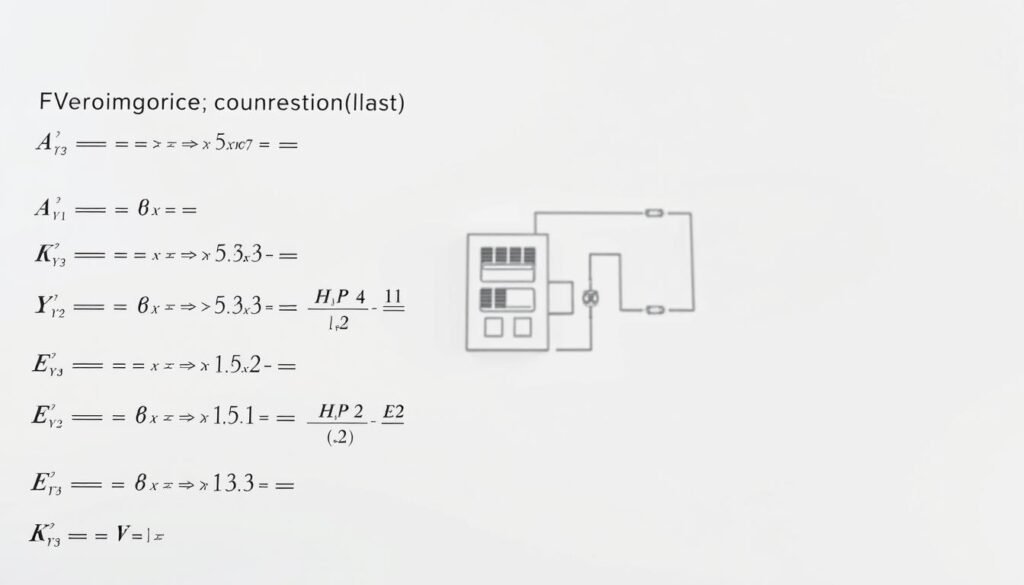
We explain the main thermodynamics formulas HVAC engineers use. These formulas are key in moving from design to detailed load models. They help keep data consistent between tools like Carrier HAP and Revit.
Sensible heat. The formula Qs = 1.08 × CFM × ΔT helps size supply airflow. It checks if ducts and terminals can handle the load. Qs is in Btu/h, CFM is cubic feet per minute, and ΔT is in °F.
Latent heat. The formula Ql = 0.68 × CFM × ΔW calculates moisture removal rate. It uses Btu/h for Ql, CFM for flow, and ΔW in lb water per lb dry air. Psychrometric charts or HAP’s routines help find accurate ΔW.
Conduction through assemblies. The formula Q = U × A × ΔT calculates heat transfer. Use W or Btu/h for Q, W/m2·K or Btu/h·ft2·°F for U, m2 or ft2 for A, and K or °F for ΔT. Revit and HAP let you override U-values for simpler load runs.
Solar heat gain on glazing. The formula Qsolar = Awindow × SHGC × I estimates window gains. Qsolar is in W or Btu/h, Awindow in m2 or ft2, SHGC is dimensionless, and I is incident irradiance. HAP and Revit use site weather data and shading to refine solar inputs.
We keep a list of extra relations handy. Air heat capacity Cp ≈ 0.24 Btu/lb·°F and density ≈ 0.075 lb/ft3 are used in the formulas. Convert between W and Btu/h with 1 W = 3.41214 Btu/h for metric to imperial system changes.
When moving data, check units and rounding. This ensures HVAC teams can rely on the formulas for accurate sizing.
Setting Up Revit Model for Accurate gbXML and Loads Export
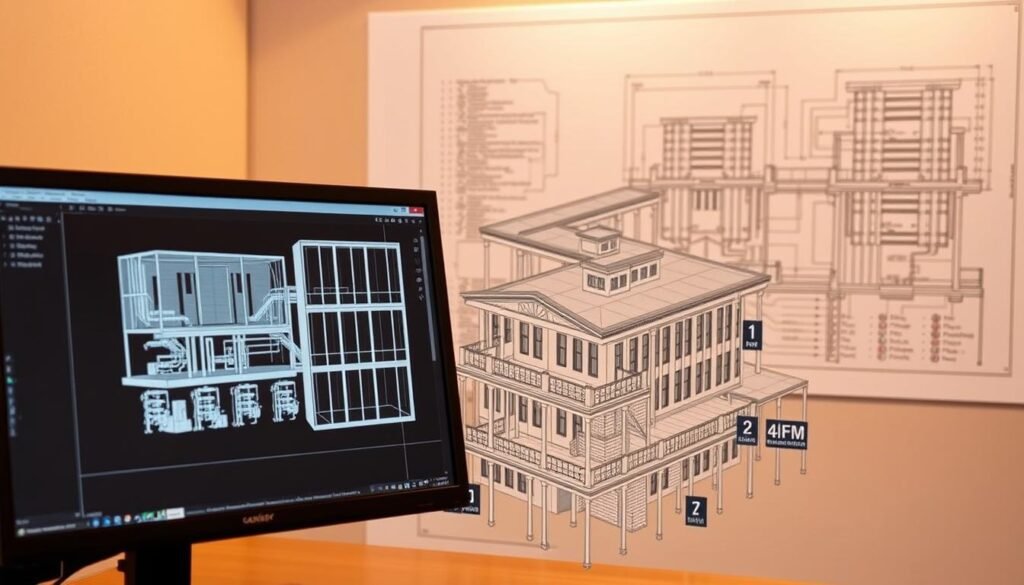
We start with a clean model setup for reliable gbXML export and accurate load results. A well-organized revit model setup gbxml ensures precise geometry, areas, and volumes. Even small errors in levels or unbounded elements can lead to a lot of rework during HAP import.
Room bounding is key: set walls, floors, roofs, windows, and doors to Room Bounding. This creates sealed boxes. Spaces must reach the ceiling or roof to capture true volume. Make sure Revit levels align with the architect’s levels to avoid incorrect volumes.
For projects in India, choose the right project location in Manage → Project Location. Import an EPW that matches the local climate. Set True North and Project North to match site orientation. Also, configure the ground plane under Analyze → Energy Settings → Ground Plane for proper conditions.
Link the architect’s model and set its elements to Room Bounding before linking furniture. Linking furniture model gives accurate occupant counts and seating layouts. Use Acquire Coordinates after linking to copy origin and building azimuth, preserving solar orientation.
Small gaps can cause big problems. Set sliver space tolerance to screen out tiny chases and unwanted cavities. Choose a tolerance that excludes internal slivers but retains narrow exterior alleys. Inspect color-fill legends and space schedules to detect odd volumes.
Voids and thin families often generate tiny enclosed volumes. Remove or edit offending families, or convert problematic openings into explicit voids. Check space schedules for zero or near-zero volumes and correct them before gbXML export.
Plenums need clear strategy: model as separate spaces with correct hosting and levels if you want distinct plenum loads. For simpler workflows, combine room and plenum into a single space. Treat the plenum as part of the zone envelope when exporting gbXML export to HAP.
Use visual checks: Heating & Cooling Loads visualization, color fills, and section views make it easy to verify enclosed spaces. Run quick gbXML export trials and open in a validator or in HAP. This confirms geometry and zone counts match expectations before starting detailed load work.
Revit HVAC Loads Toolkit Workflow and Project Preparation
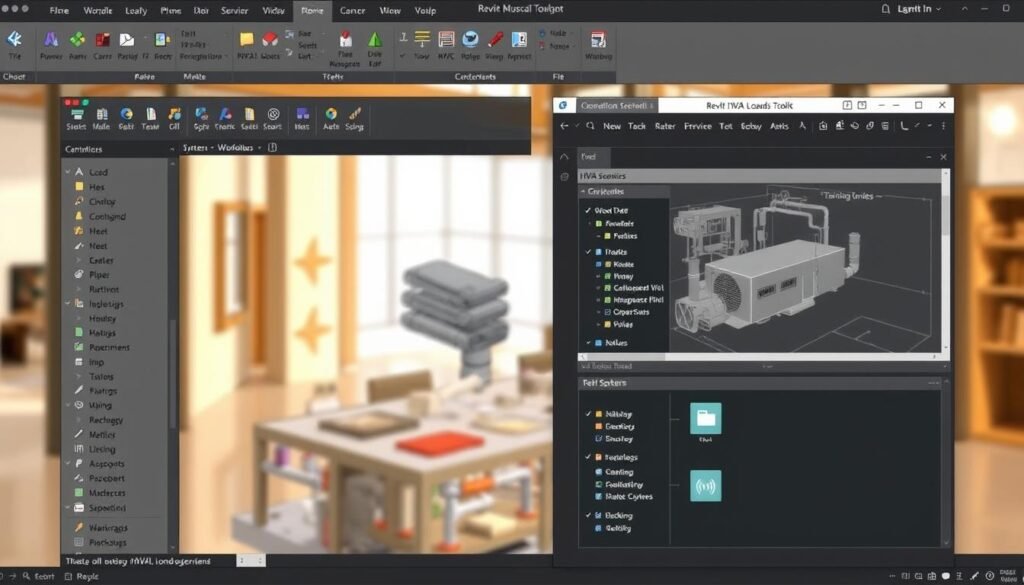
We start by getting the model ready for consistent load results. Use the revit HVAC Loads Toolkit or Ripple Loads Toolkit to set project-wide defaults. These include design temperatures, clearness numbers, and ventilation baselines.
Make sure the ground plane is set correctly under Analyze → Energy Settings → Ground Plane. This prevents below-grade geometry from being treated as above-grade for solar or infiltration.
Run the recommended settings early and after major model updates. The tool writes defaults into the project. This way, multiple team members share the same baseline. It reduces rework when exporting gbXML for Carrier HAP or using Revit’s internal loads engine.
Rooms to spaces automation helps convert geometry from linked architectural models. It creates spaces from rooms, raises the space top to the highest bounding surface, and generates plenum volumes where needed. Run it often: the tool only updates new or changed rooms. This keeps processing quick as the project evolves.
We check that lights and equipment belong to the correct space volumes. Proper bounding captures internal loads and avoids orphaned lighting that skews results. Use the Architectural Element Finder to surface elements whose thermal or space associations need fixes.
Assign space types and occupancy early for clean ventilation and internal loads mapping. Use the assign space types occupancy function to map room names to ASHRAE 62.1 space types automatically. Review the LTK-Space Loads schedule for unmapped rooms and correct them before export.
The toolkit includes ASHRAE 62.1-2016 defaults for ventilation rates, lighting, and plug densities. These are derived from IECC guidance. Modify defaults at Manage → MEP Settings → Building/Space Type Settings when project-specific rates are needed for Indian codes or client preferences.
Internal loads automation compares actual electrical model counts against defaults. Choose the Internal Loads routine to pick between linked electrical values and space-type defaults. The assistant flags large deviations and uses a 75% threshold to pick the most likely value. For people counts, the tool attempts seat counting from linked furniture to set occupancy automatically.
Apply code-minimum constructions using Set Code Minimum Construction Types when you need IECC or ASHRAE 90.1 baselines. Use the Constructions Manager to edit materials: R-value, thickness, density, and specific heat. Edit fenestration data for R-value and SHGC with angle-specific inputs when solar performance matters.
After QA, choose one of two export paths. Run Revit’s internal loads engine at Analyze → Heating and Cooling Loads → Calculate to populate space parameters for quick checks. For Carrier HAP workflows, export gbXML (3D view → File → Export → gbXML) and import to HAP for hourly heat balance and system-level simulation.
We include a concise checklist and comparison to guide decisions before export.
| Task | When to Run | Why It Matters | Toolkit Action |
|---|---|---|---|
| Set Recommended Settings | Project start and after major model changes | Ensures consistent defaults for loads, solar, and ventilation | Populate defaults via revit HVAC Loads Toolkit / Ripple Loads Toolkit |
| Ground Plane Check | Before solar/infiltration calculations | Prevents below-grade zones from receiving solar or infiltration | Verify Analyze → Energy Settings → Ground Plane |
| Rooms to Spaces Automation | After linking architecture and during design updates | Creates accurate spaces and plenums; captures lighting/equipment | Run rooms to spaces automation; repeat as model evolves |
| Assign Occupancy Category | Once room names are stable | Maps ventilation rates and internal loads to ASHRAE rules | Use assign space types occupancy for ASHRAE 62.1 mapping |
| Internal Loads Automation | After electrical/furniture link | Chooses actual vs default lighting and people counts | Run Internal Loads; review flagged discrepancies |
| Constructions and Overrides | Before final export | Defines envelope thermal performance for accurate loads | Use Constructions Manager and Set Code Minimum Construction Types |
| Export | After QA and schedule verification | Selects target engine: Revit engine for quick checks, gbXML for HAP | Run Revit calculate or Export → gbXML for Carrier HAP |
Internal and External Loads in Revit and HAP

We show how to get internal and external loads right in Revit and Carrier HAP. Getting this right stops oversized equipment and wrong energy profiles. This guide helps teams match model data with ASHRAE standards for Indian projects.
Defining occupant, lighting and equipment gains
First, set the design occupant density. You can use people per area or fixed counts. Revit Toolkit can count seats and fill in occupancy automatically.
Use ASHRAE tables for sensible and latent heat per person. This helps assign loads accurately.
For lighting, use actual loads from electrical models if possible. The Toolkit helps switch between actual and default densities based on a clear rule.
Include equipment and plug loads as scheduled profiles. Both Revit and HAP accept hourly schedules. This reflects how things work in real life.
Modeling the building envelope, solar and shading
Use Schematic or Construction Types in Revit to set U-values and R-values. This ensures consistency for Indian projects. This avoids mismatched losses.
Model fenestration with accurate window area and SHGC entries. Use correct site azimuth and coordinates for solar effects. Both platforms handle shading well when geometry is precise.
Define fixed shading elements in the model. HAP will use clear-sky procedures for solar calculations. It also simulates internal and building self-shading automatically.
Accounting for thermal mass and radiant time-series delay
Enter material thickness, density, and specific heat in Revit. This represents thermal storage. It shows how surfaces store and release heat over time.
Use HAP’s Heat Balance solver for thermal mass. It treats thermal mass and radiant exchange well. Revit’s engine mainly deals with sensible loads, not latent loads.
For buildings with heavy masonry or concrete slabs, check mass properties. Run final analysis in HAP. This is important for peak sizing or humidity control strategies.
Carrier HAP Workflow: From Building Model to Hourly Load and Energy Results

We help project teams move a Revit model to detailed hourly analysis. This process includes finding the right equipment size. We use a mix of automated and manual steps to keep data reliable for design and compliance in India.
Importing geometry and data from gbXML or manual input strategies
First, export gbXML from Revit to HAP. This captures important details like spaces, windows, and internal loads. We then check for any errors in the import.
If gbXML doesn’t work, HAP’s 3D tools are a good backup. We use floor plans and define levels to recreate the model. This method ensures accuracy and helps solve problems quickly.
HAP’s hourly heat balance simulation and weather file usage
HAP runs detailed simulations using the ASHRAE Heat Balance method. It calculates loads and models various factors like solar radiation and infiltration.
Choosing the right weather files is key. HAP has over 7,400 stations and supports different formats. We pick the closest Indian station or use a local EPW for accurate climate data.
Generating zone, space, and system heat balance reports in HAP
Heat balance reports give detailed insights into loads and system performance. We run summaries to find out what’s driving the loads.
These reports export to CSV for further analysis. They help us choose the right equipment for the project.
Here’s a checklist to keep the workflow consistent:
| Step | Key Action | Deliverable |
|---|---|---|
| 1. Prepare Revit | Validate rooms, spaces, finishes, and schedules | Clean gbXML export with mapped constructions |
| 2. Import to HAP | import gbxml to HAP and run initial mapping checks | Geometry, zone lists, and preliminary loads |
| 3. Sketch-over correction | Use HAP 3D tools to redraw problematic spaces | Corrected model aligned with architectural plans |
| 4. Weather selection | Load HAP weather files or local EPW | Representative climate file for simulation |
| 5. Run simulations | Execute HAP hourly heat balance for design days and annual run | Hourly load profiles and energy use summaries |
| 6. Extract reports | Generate heat balance reports, sizing and energy outputs | Zone, system, and plant sizing tables; CSV exports |
| 7. QA/QC | Compare HAP outputs to Revit loads and project expectations | Signed-off report set for design and procurement |
Ventilation, IAQ, and ASHRAE 62.1 Implementation in HAP and Revit
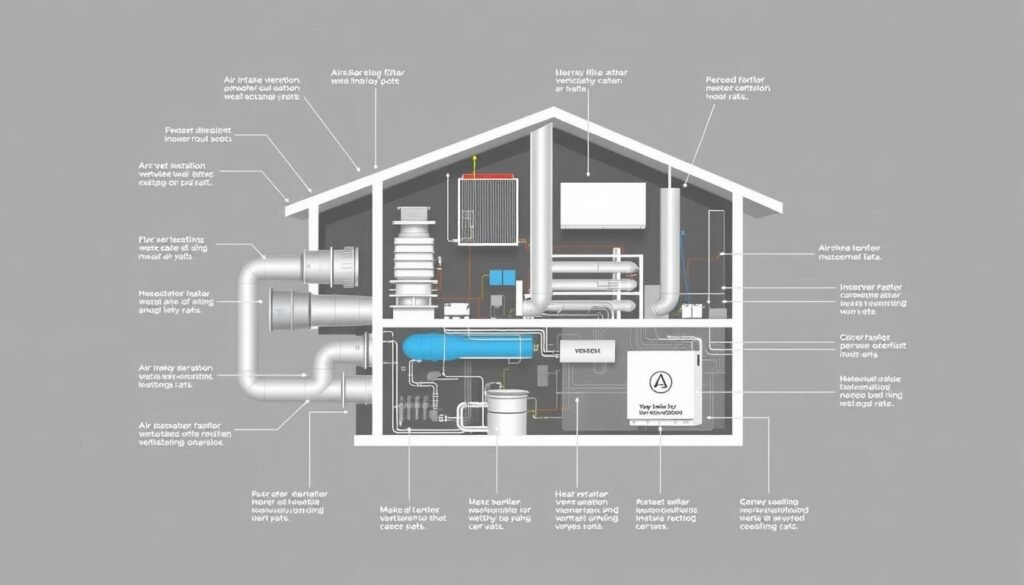
We offer practical advice for following ventilation ASHRAE 62.1 rules and improving indoor air quality. Our aim is to link Revit’s space assignments with HAP’s system-level calculations. This way, IAQ in HAP and Revit can be tracked and checked during handoffs.
Space-level settings are the first step in control. Revit and the Ripple Toolkit let us assign ASHRAE 62.1 space types. We can set per-person and per-area outdoor air rates. These defaults help calculate the minimum outdoor airflow for each room and show up in the LTK-Space Loads schedule.
System-level ventilation combines space needs into one design value. HAP uses the Ventilation Rate Procedure to figure out system outdoor air needs. It also offers a sum-of-spaces method for simpler projects. HAP’s Ventilation Sizing Summary keeps track of assumptions and the sizing method used.
DOAS sizing HAP workflows are key when latent loads are a big issue. HAP helps size DOAS airflow, includes preheat/precool options, and has heat recovery devices. In humid climates, modeling a DOAS with dedicated dehumidification in HAP is accurate. It helps choose the right plant size.
It’s important to map Revit space names to standards to avoid surprises. Use the Toolkit’s ASHRAE 62.1-2016 library to automate assignments. Then, review the matches. Make sure to correct any unmapped rooms before exporting to HAP to keep space types consistent.
We suggest documenting any changes from default rates. If a project uses enhanced IAQ strategies or higher per-person flows, note those changes. Make sure these changes are kept in gbXML or re-entered in HAP to keep IAQ consistent.
The table below shows common approaches and the recommended checks for compliance and model accuracy.
| Focus | Revit / Toolkit | Carrier HAP | Recommended Check |
|---|---|---|---|
| Space assignment | ASHAE 62.1-2016 library; auto-assign occupancy | Receives gbXML or manual space inputs | Validate LTK-Space Loads schedule; correct unmapped rooms |
| Space-level ventilation | Per-person and per-area default rates; computes space OA | Used as input to sum-of-spaces or VRP | Confirm unit consistency and occupant densities |
| System-level ventilation | Not calculated; exports space data | VRP and sum-of-spaces; Ventilation Sizing Summary | Review method selection and system OA values |
| DOAS modeling | Define space loads; no DOAS object | DOAS sizing HAP with coils, recoveries, economizers | Model DOAS coils for latent control in high-humidity climates |
| IAQ documentation | LTK schedules and comments in Revit | Ventilation Sizing Summary and heat balance reports | Export reports and attach assumptions to project deliverables |
System and Equipment Sizing: From Zone Loads to Plant Selection
We explore how to connect zone loads to equipment choices. This part focuses on using HAP to size coils, fans, and central plant parts. It offers clear examples to guide engineers in making the right picks.
Sizing coils, fans, and terminal units using HAP outputs
We begin with HAP Zone Sizing Summary and Air System Sizing Summary. These give us peak loads, airflow, and temperatures. Use Qs = 1.08 × CFM × ΔT to check sensible needs and confirm CFM from HAP.
For coil and fan sizing, look at HAP’s terminal unit tables. These cover VAV, CAV, and more. Set supply temperatures and reheat based on HAP’s outputs.
Start with Revit schedules for CFM, then adjust in HAP. This ensures coil and fan selections match zone curves. Capture fan static needs from HAP airflow and duct runs.
Chiller and boiler plant sizing summaries and chiller performance data
HAP gives Plant Sizing Summaries and chiller load profiles. These show peak and hourly cooling demand. Use these for chiller and boiler sizing in HAP.
Choose chiller type: centrifugal, screw, scroll, or absorption. Import Carrier data or use HAP templates to compare performance. Size cooling towers and pumps with peak condenser loads from HAP.
VRF, WSHP/GSHP and fan coil equipment considerations in HAP
HAP aggregates terminal loads for VRF and fan coil units. Consider diversity and part-load performance. Verify VRF WSHP GSHP selection against combined load.
For GSHP systems, HAP models borefields and ground heat rejection. Size pumps and heat exchangers based on this. For water-source heat pumps and fan coils, use HAP’s outputs to set duty and control sequences.
Equipment controls and sequencing that affect sizing
Model temperature reset, ventilation control, and more. Control strategies change coil loads and plant duty. Reflect these in HAP runs and spreadsheets.
Document assumptions for supply temperatures, diversity factors, and control logic. This makes sizing transparent and repeatable for teams in India.
Psychrometrics and Humidity Considerations for Indian Climates
We look at the challenges of controlling humidity in India’s hot, humid, and rainy climates. Good psychrometric practices help us size ventilation, pick dehumidification, and set supply-air conditions for sensitive areas. This part talks about when to do humidity studies, which psychrometric relations to use, and software differences.
We analyze spaces with big moisture loads separately. These include natatoriums, laundries, cold rooms, data centers, museums, and some healthcare areas. They need strict control of dew point and relative humidity for comfort, asset protection, or process needs.
Natatoriums and laundries are classic examples. Moisture from pools and wash cycles creates sustained latent loads. Standard models miss these. We use DOAS, desiccant wheels, or mechanical dehumidification based on moisture studies.
Using psychrometric relations
We use key relations like humidity ratio, enthalpy, and dew point. The humidity ratio is water vapor mass per dry air mass. Enthalpy combines sensible and latent energy. Dew point is when air condenses.
Working with these relations helps us choose supply conditions. We use charts, calculators, or HAP’s tools to find supply dew point, enthalpy, and coil loads.
Handling latent loads: HAP vs Revit
HAP does hourly psychrometric calculations. It reports zone humidities, supply and return conditions, and latent coil hours. It supports humidistats, humidifiers, and hot-gas reheat dehumidification strategies. This gives reliable latent loads HAP vs Revit comparisons for final design and DOAS sizing.
Revit’s engine assumes latent gains mostly from occupants. It treats moisture as instantaneous. This misses time-delayed moisture release and additional humidity gains. In rainy regions, Revit underestimates latent load and makes optimistic SHR and coil selections.
For projects in India, we use Revit for geometry and initial loads. We move detailed latent modelling to Carrier HAP or a specialist psychrometric tool before specifying dehumidification. This workflow reduces risk and ensures humidity-control hardware meets real operating conditions.
Model Validation, Reports, and Documentation Best Practices
We start by checking if the model matches the design and site conditions. This step helps avoid surprises during construction and start-up. Use a checklist to keep track of all important steps and notes. This way, team members can easily show their work to clients or during audits.
Key HAP outputs to extract
First, pull out HAP reports for heat balance in spaces, zones, and systems. This checks how heat moves around. Next, export hourly load profiles HAP to see how loads change throughout the day. Also, save summaries for air, zone, ventilation, and plant sizing to help pick the right equipment.
Revit reporting and schedule exports
Make a Revit Loads Report LTK-Space Loads schedule to get cooling and heating loads. Export this data in CSV RTF or .txt for easy checking in spreadsheets. Save the .htm output from Revit for clear documentation and visual checks.
Documenting assumptions and overrides
Keep a log of project assumptions, including design setpoints and weather file sources. Use special parameters for any manual changes to avoid losing them. This way, you can keep your design choices clear and intentional.
Practical export and archive strategy
For detailed analysis, export hourly load profiles HAP to CSV and save the original HAP files. From Revit, export schedules to CSV RTF for easy sharing. Use a simple folder structure with clear names for all reports, including HAP summaries.
Alignment with ASHRAE and ISHRAE practice
Make sure to document all ASHRAE ISHRAE assumptions used. This includes ventilation, setpoints, and code references. This helps with peer review and meets client and regulatory needs.
Quick checklist for delivery
- Export HAP heat balance summaries and hourly load profiles HAP to CSV.
- Produce Revit Loads Report LTK-Space Loads and export CSV RTF.
- Save visual QA images and color-fill schedules from Revit.
- Maintain an assumptions log to document ASHRAE ISHRAE assumptions and manual overrides.
- Archive files with a clear naming convention for audits and handover.
Common Pitfalls and Troubleshooting in Revit and HAP Workflows
We often run models that look clean but hide small issues that skew load results. This guide helps us spot and fix common errors in Revit and Carrier HAP workflows. We focus on practical issues like geometry, coordinates, weather, and plant diagnostics.
Voids and non-room-bounding elements create unexpected volumes. Small unintended floors, thin families, or holes in walls can produce sliver spaces with tiny heights. These distort zone volumes and peak loads. For voide spaces sliver space troubleshooting, we edit families, remove room-bounding on nonessential items, or tune the sliver tolerance in the Revit HVAC Loads Toolkit.
Plenums and mis-tagged spaces may be excluded from load calculations. Spaces marked as plenum in HVAC zones sometimes get omitted. We use Revit’s Find Active Elements and space volume schedules to locate anomalies. Verifying room-bounding and reviewing the space type avoids missing internal gains and ventilation loads.
Mismatched levels between linked architectural and MEP models break space bounding. Acquire Coordinates must be used correctly when linking models. If levels are out of sync, spaces shift vertically and gbXML export fails to represent zones. For mismatched levels orientation weather selection, we align levels, verify project north, and confirm that links inherit shared coordinates.
Orientation errors change solar loads dramatically. An incorrect project north or wrong azimuth setting alters glazing incident angles. We cross-check orientation in Revit against site plans and use map-based station selection to reduce ambiguity when exporting to HAP.
Choosing the wrong weather station leads to misleading results. A distant station or incompatible file format distorts peak sizing and unmet hours. We prefer map-based station selection in HAP or import a local EPW for Indian sites to match climate data accurately.
Unmet load hours in HAP flag times when plant capacity falls short. The Unmet Loads report helps us pinpoint latent or sensible peaks. Common causes include underestimated diversity, incorrect supply temperatures, or missing ventilation capacity. For unmet load hours HAP debugging, we compare zone peaks to terminal capacity and inspect coil performance data.
Debugging plant sizing requires systematic checks. We review supply temperature assumptions, diversity factors, and chiller sequencing. Confirming chilled-water reset strategies and DOAS sizing often resolves latent-dominated unmet hours. We simulate critical worst-case hours to validate plant margins.
gbXML translation inconsistencies can disrupt model handoff. Third-party importers may interpret Revit geometry differently. We export simplified geometry for gbXML, clean small faces, and manually align any imported elements in HAP. Clear documentation of assumptions reduces rework.
Revit HVAC Zones have semantics that affect terminal, AHU, and ventilation behavior. Misunderstanding parameters leads to mis-sized equipment. We map each parameter to HAP inputs and run unit checks: zone sensible and latent peaks, ventilation profiles, and hourly loads. These checks catch ambiguous zone definitions early.
When we combine careful geometry checks, correct coordinates, accurate weather selection, and thorough HAP debugging, model reliability improves. Small fixes pay big dividends: fewer surprises during plant selection and a smoother handoff between Revit and Carrier HAP.
Practical Tips for Efficient Workflow and QA/QC in India
We start every project by linking the architectural model and setting Room Bounding. We use Acquire Coordinates early to lock orientation and weather. This step cuts down on rework and helps in an efficient workflow Carrier HAP Revit when exporting gbXML later.
Revit’s Copy/Monitor for lighting and electrical helps capture actual internal loads. This is better than relying on defaults.
Automate Rooms-to-Spaces with the Revit Loads Toolkit and assign ASHRAE 62.1 space types. Run the internal loads assistant and set code-minimum constructions. Generate a “1-Click Loads” snapshot for early CFM distribution.
Only export gbXML after spaces, constructions, and internal gains are QA’d. This keeps the hvac load calculation using carrier hap & revit per ashrae/ishrae process reliable.
In Carrier HAP, import the gbXML and run the ASHRAE Heat Balance hourly engine. Use a proper Indian EPW/TMY weather file. Check orientation, space volumes, window-to-wall ratios, SHGC, and U-values against architectural takeoffs.
This checklist prevents sizing errors. It produces auditable HAP Heat Balance Summaries and Revit LTK schedules for client records.
For humid-tropical projects, include DOAS or a dedicated dehumidifier early. Model latent loads in HAP. Use Carrier chiller templates or Electronic Catalog curves for realistic plant selection.
Keep a living assumptions document—setpoints, schedules, constructions—and log manual overrides separately. By combining Revit automation and Carrier HAP rigor, we deliver efficient, auditable, and code-compliant HVAC design.


